Ultrasound Equipment FAQ
Posted on June 3, 2016
GE LOGIQ e
How to transfer a study to EMSOW PACS Bridge
- On your ultrasound machine, press the Patient button.
- Find the patient under Patient view (the bottom part of the screen).
- Double-click the patient’s record, select an exam in the table that appears, and click the SEND TO button.
- Select “To: EMSOW” where EMSOW is the name of the DICOM service set up for Bridge.
Echocardiology studies are exported as still images instead of moving image sequences? No measurements in reports?
In order to properly set up your GE ultrasound machine for exporting echo studies to EMSOW, please do the following:
- Press the Utility key on the machine’s keyboard. On the top of the screen that opens, select the Connectivity tab.
- Go to the Service subtab, select the destination device set up for EMSOW Bridge (typically it’s named DICOM or something similar), and select the corresponding service. The service typically has “UNVSCP” as its AE Title.
- In the Properties pane on the right, select the checkbox Allow Multiframe so that your machine sends echo studies as moving image sequences.
- Make sure the Enable Structured Reporting checkbox is selected (otherwise it prevents the machine from sending automated measurement data, which is another typical echo-related issue).
Note: If you use a USB flash drive to transfer images, please perform the same actions for the “MyComputer” destination device.
Mindray M7
See page 12-5 of the machine’s user manual for instructions on setting up the DICOM service (including DICOM Structured Reporting).
Mindray M9
See the machine’s user manual.
To connect the machine to your computer, please use an Ethernet crossover cable and a USB-to-Ethernet adapter, such as Anker A7611.
ESAOTE MyLabFive
- On your MyLab machine, please press the MENU button, select DICOM CONFIGURATION, and enter the REPORT tab of the configuration panel.
- Under REPORT EXPORT, select EXPORT DICOM STRUCTURED REPORT and save the configuration.
- Try sending an echocardiology study to EMSOW (you can resend an existing study). In EMSOW, open PACS STORAGE and see if the received study has “SR” in the Modalities column.
Vivid i
-
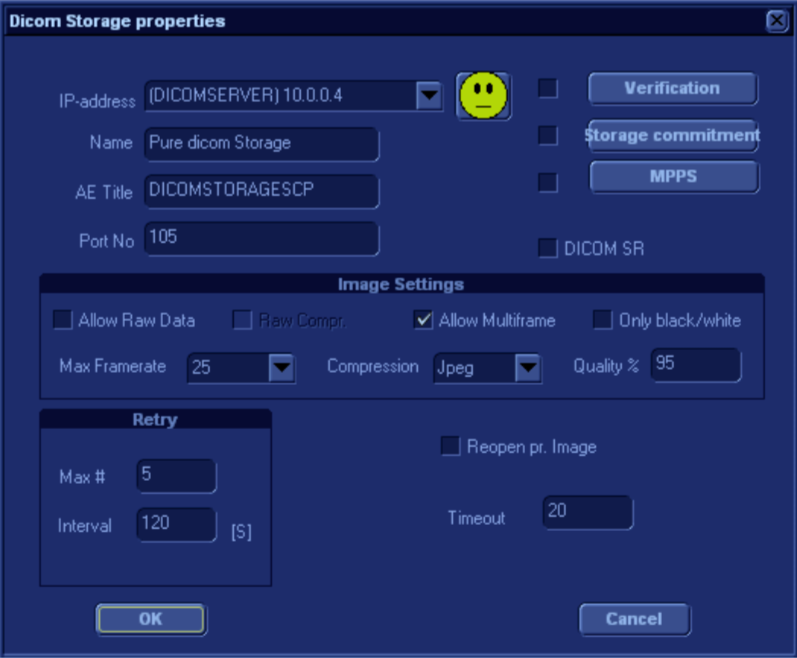
Activating DICOM SR
DICOM SR must be activated for each DICOM device.1 Press CONFIG and log on as administrator.2 Select the Connectivity category and Dataflow subgroup. The Dataflow sheet is displayed.3 Select the DICOM dataflow to configure in the Name pull-down menu (see Figure 8-32).4 Select a DICOM storage device in the Selected devices pane and press Properties.
The Properties window for the selected DICOM stogare device is displayed.5 Check the option DICOM SR.6 Select OK.7 Press CONFIG.
Also make sure the “Allow Multiframe” option is turned on so that you get moving echo images.