The Reading Setup module is designed for managing reading doctors, reading facilities, reading rules, reading times, report templates, and report receiver providers.
Managing reading doctors
Follow the path SETUP → READING → READING DOCTORS to open the Reading Doctors tab:
Here you can see the list of reading doctors arranged in the columns: ID, Prefix, Last name, First name, Middle name, Suffix, Sign/Logo, NPI, SSN, Send options, Facilities, Contacts, Use transcription, Actions. The last column contains two buttons for editing and removing a reading doctor.
Above the list of reading doctors you can see the toolbar:
Add new – click this button to add a new reading doctor. As the result, the Add new reading doctor window will appear.
Here, on the Common tab, you can add the full name (which consists of the prefix, last name, first name, middle name, and suffix) and identifiers (NPI and SSN). Click the Use transcription checkbox to set a transcription fee. Click the Disabled checkbox to make the reading doctor’s account unavailable for use.
On the next tab – Send options – you can set up the parameters of sending processed studies to the reading doctor:
In the E-mail section, you can set up the parameters of sending the processed studies via e-mail. To enable sending the processed studies via e-mail, click the Enabled checkbox. In the Include files list, you can select the file types that can be sent via e-mail. If you need to send old reports from all studies, click the corresponding checkbox. In the Group by list, you can select the way of grouping files: all in a single file, by patient, by patient/study. If you need to convert files to PDF, click the corresponding checkbox.
In the PACS section, you can set up the parameters of sending the processed studies to a PACS server. To enable sending the processed studies to a PACS server, click the Enable checkbox. In the Destination list, select the required PACS server. In the Include files list, you can select the file types that can be sent to the PACS server. If you need to send old reports from all studies, click the corresponding checkbox. If you need to send the files as DICOM images or PDF files, check the corresponding checkboxes in the Send files as field. In the Exclude mods list, you can select the DICOM modalities that will not be sent. Click the Patch DICOM metadata checkbox to select the kinds of metadata that will be exported from EMSOW into the DICOM images. If you select Institution name, you can also use the referring facility name as the “Institution name” tag and enter a prefix to be added to the name. If you select Issuer of A/N, you can also select the accession number type to be exported: auto, internal, or external. External accession numbers are used when studies are sent to your EMSOW site from an external EMSOW site (also known as a client domain).
On the next tab – Facilities – you can select reading facilities that the reading doctor is associated with.
Use the arrow buttons to select the required facility or drag the facility from the Available to the Selected section. The reading facilities displayed in italic are disabled.
On the next tab – Contacts – you can add contacts for the reading doctor. To add a contact, click the Add button and select the contact type in the drop-down menu: Phone, Fax, E-mail, Jabber, Address, or Location.
After you select the type of the contact, you can enter the contact information in the new pop-up window:
Use the Up and Down buttons to change the contact’s priority over other contacts of the same type. For example, if there are several phone numbers, you can set which of them will be the first, which of them will be the second, and so on. To edit the selected contact, click the Edit button or double-click the contact. To delete the selected contact, click the Remove button. To delete all contacts, click the Clear button.
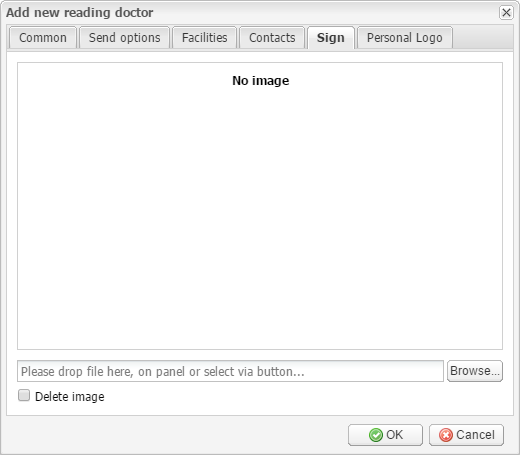
On the next tab – Sign – you can upload the doctor’s signature:
Click the Browse button and select the file with the signature. The signature will be used for signing image interpretation reports. To remove the signature, click the Delete image checkbox.
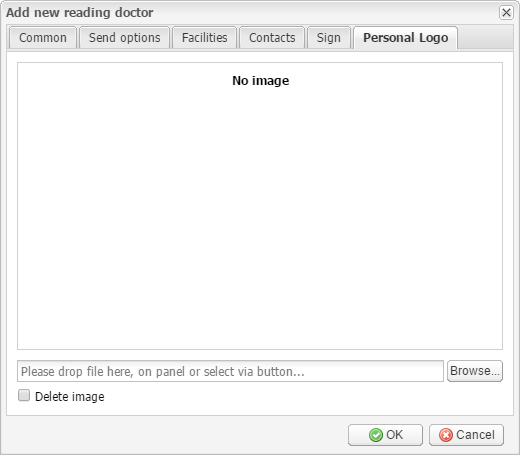
The last tab is Personal Logo. Here you can upload a personal logo for the doctor by clicking the Browse button and selecting the file with the personal logo:
To remove the logo, click the Delete image checkbox.
After you enter all necessary information, click OK to add the reading doctor or Cancel to close the window without saving.
For editing an existing reading doctor, click the Edit selected button on the toolbar. You can also double-click the reading doctor or click the edit button in the Actions column. As the result, the Edit reading doctor window will appear. This window is identical to the Add new reading doctor window described above.
Managing reading facilities
Follow the path SETUP → READING → READING FACILITIES to open the Reading Facilities tab:
Here you can see the list of reading facilities arranged in the columns: ID, Short name, Full name, NPI, EIN, PoS, Taxonomy, Send options, Logo, Doctors / Reading limits, Reading fees, Allowed studies, Allowed insurances/self-paid, Contacts, and Actions. The last column contains two buttons for editing and removing a reading facility.
Above the list of reading facilities you can see the toolbar:
Add new – click this button to add a new reading facility. As the result, the Add new reading facility window will appear.
On the Common tab, you can enter the short name, full name, NPI, EIN, taxonomy code, and select the PoS code and billing company. Click the Disabled checkbox to make the reading facility unavailable for use.
On the next tab – Send options – you can set up the parameters of sending processed studies to the reading facility:
In the E-mail section, you can set up the parameters of sending the processed studies via e-mail. To enable sending the processed studies via e-mail, click the Enabled checkbox. In the Include files list, you can select the file types that can be sent via e-mail. If you need to send old reports from all studies, click the corresponding checkbox. In the Group by list, you can select the way of grouping files: all in a single file, by patient, by patient/study. If you need to convert files to PDF, click the corresponding checkbox.
In the PACS section, you can set up the parameters of sending the processed studies to a PACS server. To enable sending the processed studies to a PACS server, click the Enable checkbox. In the Destination list, select the required PACS server. In the Include files list, you can select the file types that can be sent to a PACS server. If you need to send old reports from all studies, click the corresponding checkbox. If you need to send the files as DICOM images or PDF files, check the corresponding checkboxes in the Send files as field. In the Exclude mods list, you can select the DICOM modalities that will not be sent. Click the Patch dicom metadata checkbox to select the kinds of metadata that will be exported from EMSOW into the DICOM images. If you select Institution name, you can also use the referring facility name as the “Institution name” tag and enter a prefix to be added to the name. If you select Issuer of A/N, you can also select the accession number type to be exported: auto, internal, or external. External accession numbers are used when studies are sent to your EMSOW site from an external EMSOW site (also known as a client domain).
On the next tab – Doctors / Limits – you can set a daily reading limit for each reading doctor:
Click the Add button and then select in the Reading doctor column the reading doctor for whom you want to set a reading limit. After you select the required reading doctors, you can set their reading limit in the Day reading limit column. The default value is no limit. To delete a reading limit rule, select it and click the Remove button. To delete all rules, click the Remove all button.
On the next tab – Allowed Studies – you can select the studies that a specific reading doctor can read:
Click the Add button and then select in the Reading doctor column the reading doctor for whom you want to set an allowed study. Then select the allowed study in the Study column. You can also select an inventory group in the Inventory group column. The default value for the last two columns is (any). To delete an allowed study rule, select it and click the Remove button. To delete all rules, click the Remove all button.
On the next tab – Allowed Insurances – you can select allowed insurances for specific reading doctors:
Click the Add button and then select in the Reading doctor column the reading doctor for whom you want to set an allowed insurance. Then select the allowed insurance in the Insurance/Self paid column. The default value is (any). You can also select to use or not to use the private ID in the Use private ID column. The default value is NO. To delete an allowed insurance rule, select it and click the Remove button. To delete all rules, click the Remove all button.
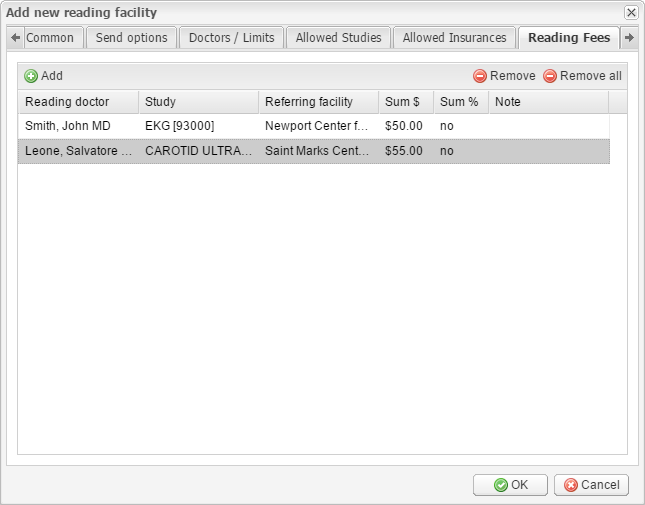
On the next tab – Reading fees – you can set up the reading fees for reading doctors:
Click the Add button to add a new reading doctor the reading fees should be set up for. You can also specify the study and referring facility in the corresponding columns. You can enter the amount of reading fee in US Dollars or in percentage values. In the Note column, you can add an annotation.
On the next tab – Contacts – you can add contacts for the reading facility:
To add a contact, click the Add button and select the contact type in the drop-down menu: Phone, Fax, E-mail, Jabber, Address, or Location.
After you select the type of the contact, you can enter the contact information in the new pop-up window:
Use the Up and Down buttons to change the contact’s priority over other contacts of the same type. For example, if there are several phone numbers, you can set which of them will be the first, which of them will be the second, and so on. To edit the selected contact, click the Edit button or double-click the contact. To delete the selected contact, click the Remove button. To delete all contacts, click the Clear button.
On the last tab – Logo – you can upload a logo for the reading facility:
To do this, click the Browse button and select the file with the logo. To remove the logo, click the Delete image checkbox.
After you enter all necessary information, click OK to add the reading facility or Cancel to close the window without saving.
To edit an existing reading facility, click the Edit selected button on the toolbar. You can also double-click the reading facility or click the edit button in the Actions column. As the result, the Edit reading facility window will open. This window is identical to the Add new reading facility window described above.
Managing reading rules
Follow the path SETUP → READING → READING RULES to open the Reading Rules tab:
Here you can see the list of reading rules arranged in the columns: ID, Position, Condition, Goes to, Note, and Actions. The last column contains two buttons for editing and removing the reading rule and also contains arrow buttons for changing the priority of a reading rule.
The reading rules determine where processed studies will be sent for reading.
Above the list of reading rules you can see the toolbar:
Add new – use this button to add a new reading rule. After you click this button, the Add new reading rule window appears:
It consists of three sections: Properties, Condition, and Goes to (reading).
In the Properties section in the Position field, enter the number of the rule. This number determines the priority of the rule. The lower the number, the higher the priority. Select the Disabled checkbox to make the reading rule unavailable for use. In the Note field you can type an annotation for the rule.
In the Condition section, you can select various conditions, such as payers (insured or self-pay patients), insurances, referring facilities, referring states, referring doctors, ordering facilities, branches, business types, technologists, rendering providers, studies, study groups, and inventory groups.
If a processed study meets these conditions, the study will be sent to the reading facility or the reading doctor specified in the Goes to (reading) section. In this section, to add a destination for reading, click the Add button. Then select the position (primary, secondary, tertiary, or additional), reading facility, reading doctor, amount of reading fees in US dollars, and (or) amount of reading fees in percentage values. In the No send column, you can choose to not send the study to the specified reading doctor.
If there are multiple doctors specified, the doctors will receive the study for reading in order from last to first. The first doctor in the list, or the primary reading doctor, will be the one who puts their signature on the report. Each of the doctors may be assigned a different fee for their work.
After you specify all required data, click OK to add the reading rule or Cancel to close the window without saving.
To edit an existing reading rule, click the Edit selected button on the toolbar, or double-click the reading rule. You can also click the editing button in the Actions column. As the result, the Edit reading rule window appears. This window is identical to the Add new reading rule window described above.
Managing reading report templates
Follow the path SETUP → READING → REPORT TEMPLATES to open the Report Templates tab:
Here you can see the list of report templates arranged in the columns: ID, Position, Managed, Name, Type, Reading, Studies, Attach Images, and Actions. The last column contains two buttons for editing and removing a report template and also contains the arrow buttons for changing the priority of report templates.
Above the list of report templates you can see the toolbar:
Add new – click this button to add a new report template. As the result, the Add new report template window appears:
On the Common tab in the Properties section, you can add a name for the new report template in the Name field. In the Position field, you can set the position of the report template. If you need to attach images (non-DICOM) to the end of the report, click the corresponding checkbox. Click the Disabled checkbox to make the report template unavailable for use.
The Template available for section allows you to set reading doctors and studies for which the template will be available.
In the Managed template section you can link the new template to one of the available managed templates. The managed templates are default templates maintained by Universal Software.
The Rule Editor tab allows you to set a rule that provides data import from DICOM images to the report:
To set the rule, you must enter a JavaScript code. On the next tab – Rule Preview – you can see the preview of the rule entered on the previous tab:
On the Template Editor tab you can edit the representation of the new template using HTML, CSS, and JavaScript:
To upload an external template file (*.tpl), click the Browse TPL file… button.
On the next tab – Template Preview – you can see the preview of the new template:
The Preview button allows you to generate a PDF file with the new template.
Click OK to add the new template or Cancel to close the window without saving.
To edit an existing report template, click the Edit selected button on the toolbar or double-click the report template. You can also click the edit button in the Actions column. As the result, the Edit report template window will appear. This window is identical to the Add new report template window described above.
Managing report receiver providers
Follow the path SETUP → READING → REPORT RECEIVER PROVIDERS to open the Report Receiver Providers tab:
Here you can see the list of report receiver providers arranged in the columns: ID, Options, Type, Name, A/N location, Filename mask, Document mask, and the Actions. The last column contains two buttons for editing and deleting a report receiving provider.
Above the list of report receiver providers you can see the toolbar:
To add a new report receiving provider, click the Add new button. As the result, the Add new report receiver provider window appears:
Enter the name of the new report receiving provider in the Name field. Click the Disabled checkbox to make the report receiving provider unavailable for use.
In the A/N location field, select where to search for an accession number: in the file name, in the document body, or both.
The Report stacking field has four radio buttons that determine how the system handles the situation when a user attempts to add a report to a study that already has a report:
- Disallow – an additional report cannot be attached, and the following error appears when the user attempts to attach an additional report: ”Unable to attach report to the service and study with already attached report”.
- Allow – an additional report will be attached as ”report“; the previous report will stay as ”report”.
- Amend – an additional report will be attached as ”report“; the previous report will be marked as ”archived report”.
- Auto – settings are set automatically.
There are also five checkboxes:
- Notify manager when report uploaded – the manager will get an e-mail message notifying that a report was uploaded (if the Auto confirm received reports option is enabled).
- Attach report to manager’s notification – when the manager gets an e-mail message that notifies about an uploaded report or asks for confirmation, the report will be attached to the e-mail message.
- Notify manager of problems – if the report was not attached for some reason, the manager will get an e-mail message with the reason why the report was not attached.
- Notify sender of problems – if the report was not attached for some reason, the sender (reply address) will get an e-mail message with the reason why the report was not attached. In the Reply to field, users can specify their e-mail to get notifications instead of the sender.
- Add letterhead with ref. facility information – the manager will get an e-mail with a letterhead that contains referring facility information.
On the Auto confirm tab you can set the parameters of automatic confirmation of the reports. If you click the Disabled radio button, the report will not be marked as confirmed and the manager will get an e-mail message that asks for confirmation. If you click the Enabled radio button, the report will be automatically marked as confirmed. The Custom radio button allows you to set custom conditions for the automatic confirmation of the report. The available conditions are : valid patient name, valid date of service, and valid date of birth.
On the Configuration tab you can specify e-mail server and user settings. In the Masks section you can enter regular expressions for matching an accession number in the subject or sender field or in the file name. Using the Keep mail for… days field you can set how long the system will store e-mails before deleting.
After you specify all necessary parameters, click OK to save settings or Cancel to close the window without saving.
To edit an existing report receiver provider, click the Edit selected button on the toolbar, or double-click the report receiver provider. You can also click the edit button in the Actions column. As the result, the Edit report receiver provider window will appear. This window is identical to the Add new report receiver provider window described above.


