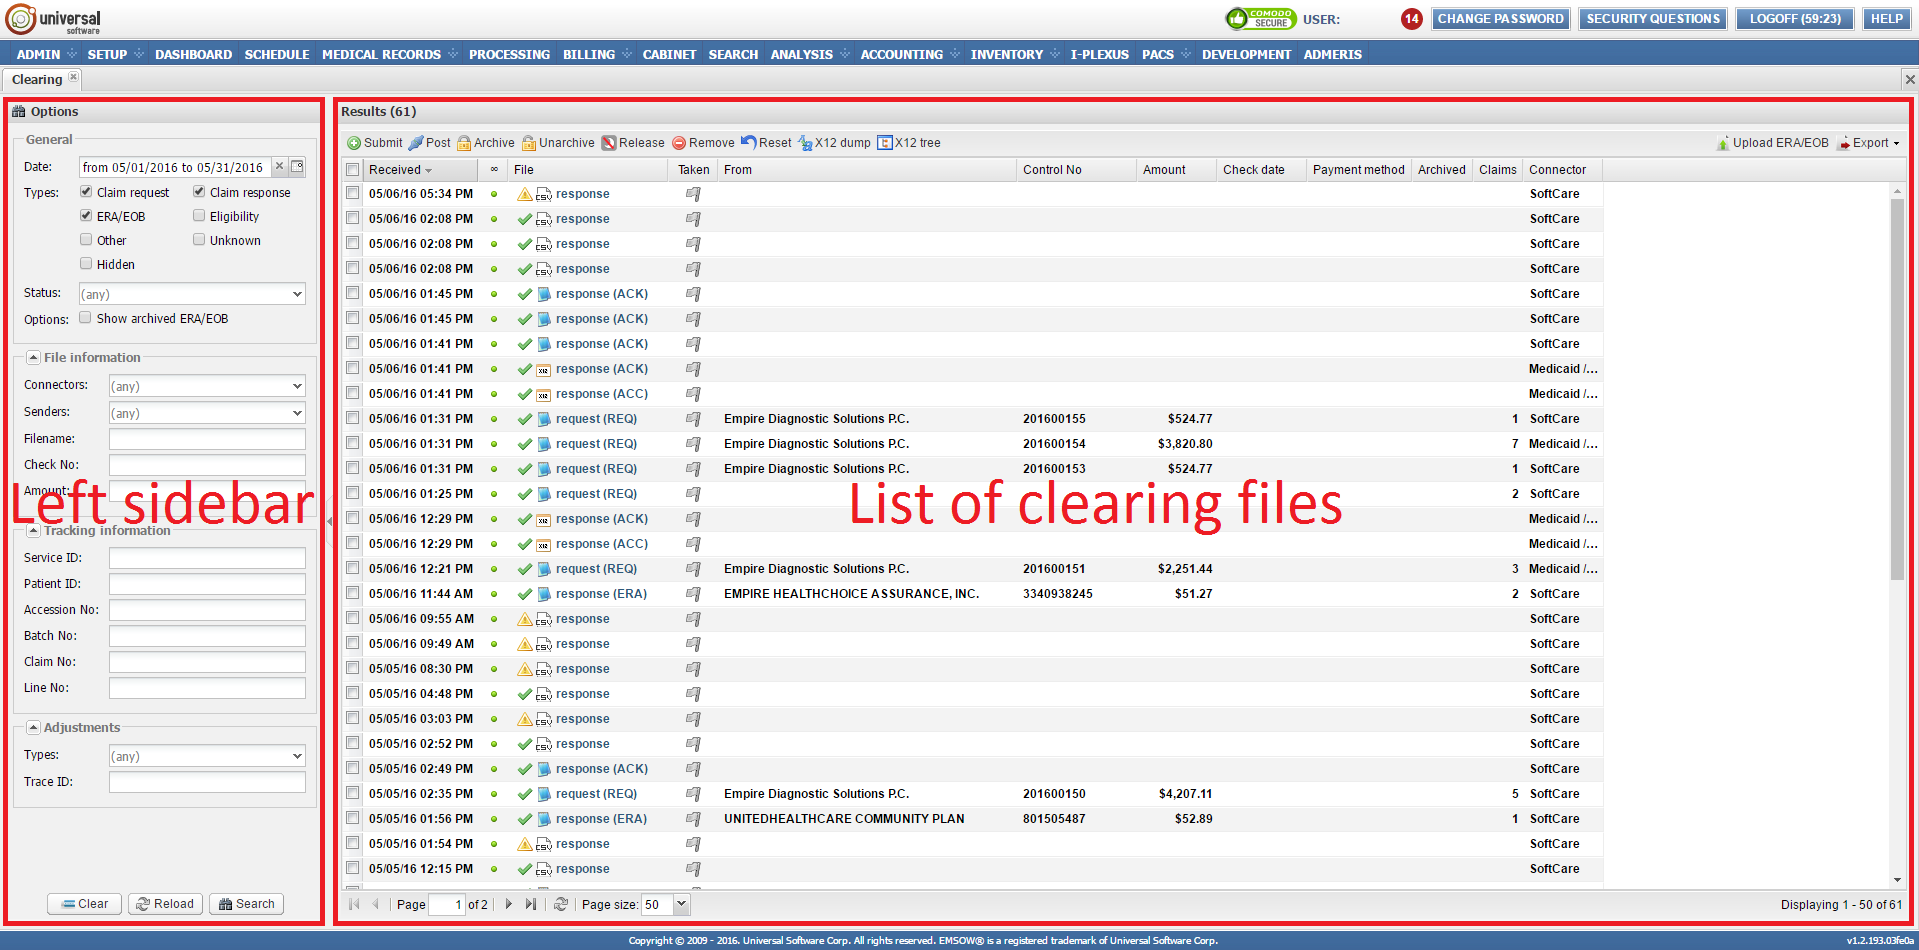
Similar to the Billing module, the Clearing module’s user interface consists of the left sidebar with search options and the list of clearing files on the right:

The left sidebar provides a search filter with numerous search options. You can use various search parameters, such as the date (specific date or date range), file types (claim request, claim response, ERA/EOB, eligibility, other, unknown, and hidden), and status. You can also specify and track file information. After you have filled out the necessary fields, click the Search button to find the appropriate clearing files. To reset all fields, click the Clear button. The Reload button allows you to reload the search results. It can be useful after you have changed some of the search fields.
On the top of the list of clearing files, you can see the status bar which displays how many results were found. Below it, you can see the toolbar:

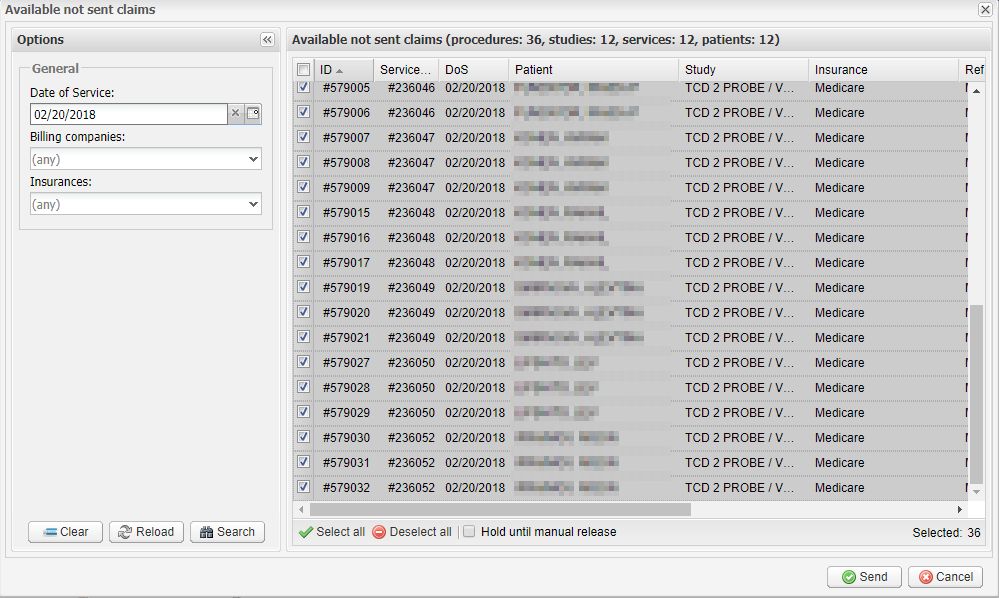
Submit – use this button to send claims. After you click the button, the pop-up window will open:
In the left part of the window, you can see the search filter that contains various options such as the date of service, billing companies, and insurances. Click the Search button to find the appropriate claims. To reset all fields, click the Clear button. The Reload button allows you to reload the search results. It can be useful after you have changed some of the search fields.
In the right part of the window, you can see available claims that have not been sent. You can select or deselect them by clicking the checkboxes as well as clicking the buttons Select all or Deselect all. The Hold until manual release checkbox allows you to postpone sending the selected claims (to send these claims you will need to click the Release button on the toolbar).
After you have selected the required claims, click Send to send them or Cancel to quit without saving.
Post – use this button for posting ERA/EOB files. After you click this button, the pop-up window will open:

Select the required services and payment method, set the check’s deposit date (optionally) by clicking the checkbox and selecting the date, and then click Post to post the ERA/EOB file.
Archive – use this button to archive the ERA/EOB file and hide it from the results window of the Clearing module. To have access to this function, your user group must have the permission “Claims clearing – archive/unarchive ERA/EOB file(s)” (please ask your system administrator to grant you this permission).
Unarchive – use this button to unarchive ERA/EOB files.
Release – use this button to send claims which were postponed by using the Hold until manual release checkbox in the Available not sent claims window.
Reset – click this button to reset the processing status for the selected files.
X12 dump – click this button to display the content of the selected X12 document as a text file.
X12 tree – click this button to display the content of the selected X12 document as a tree structure.
Furthermore, there are two buttons to the right of the toolbar:
Upload ERA/EOB – use this button for uploading ERA/EOB files. After you click this button, the pop-up window will open:

Select the connector and the path to the file, and then click Upload.
Export – this button allows you to export the search results to an Excel, Excel 2007, CSV, PDF, or HTML file.
In the list of clearing files, you can mark a clearing file as read or unread by clicking the green circle next to it. Click the flag icon to mark the file as taken into work.
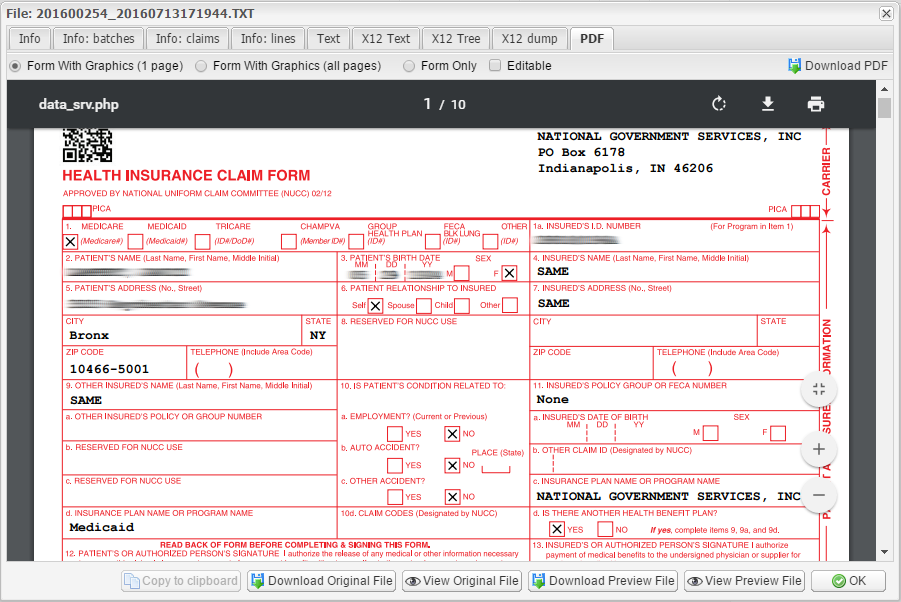
Click on a clearing file to view it. As the result, the pop-up window will open:

You can switch between tabs to view the file information, batches, claims, and lines, as well as to view the file in various representations, such as text, X12 text, X12 tree, X12 dump, and PDF. When you select the PDF tab, you can select Form with graphics (1 page) or Form with graphics (all pages) to view the file as if it was printed on a health insurance claim form. Select Form only to display only the file’s contents so that you can print the file on a paper claim form. Click the Editable checkbox to have an editable PDF file. If you need to download it, click the Download PDF button. At the bottom of the window you can see several buttons:
Copy to clipboard – this button allows you to copy all the text displayed in the window to the clipboard. This is available only in the Info, Text, and X12 dump tabs.
Download Original File – click this button to download the original clearing file that you can see in the Text tab.
View Original File – click this button to open the original clearing file in a new browser tab.
Download Preview File – click this button to download the PDF file.
View Preview File – click this button to open the PDF file in a new browser tab.
OK – click this button to close the window.
