To view and edit billing information, tick the required study and click the Service button and select Billing Edit or just double-click the required study. As the result, the Billing information window will open. This window consists of five sections: patient information, the list of studies included in the same service, Billing operations, Transactions, and Notes.
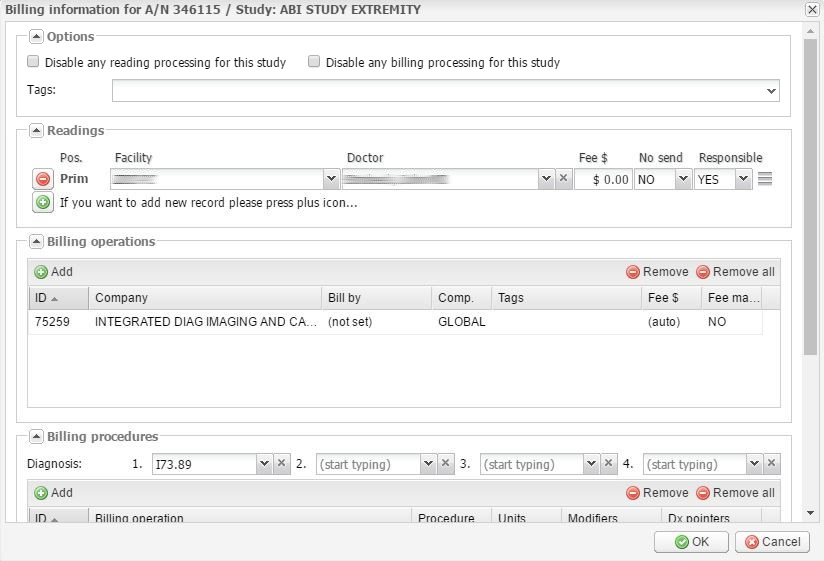
Choose the required study and click the Edit button. As the result, the pop-up window will open:

It consists of four sections: Options, Readings, Billing operations, Billing procedures. In the Options section, you can add and remove tags. You can also disable any reading or billing processing for the study by selecting the “Disable any reading processing for this study” or “Disable any billing processing for this study” checkbox. You can also use these checkboxes to run a report on the attributes No read or No bill. You will see these attributes in the Invoice report. The No read attribute will be displayed in the Reading doctor and Reading facility columns and the No bill attribute in the No bill column. In the Readings section you can select the reading facility and the reading doctor, as well as set up the amount of fees payable to the reading doctor. In the Billing operations section you can add and remove billing operations, set up the billing company, the doctor, tags, and fees. In the Billing procedures section you can add and remove billing procedures, set up diagnoses, units, modifiers and Dx pointers (diagnosis pointers). After the changes are made, click OK to save the information or Cancel to quit without saving.
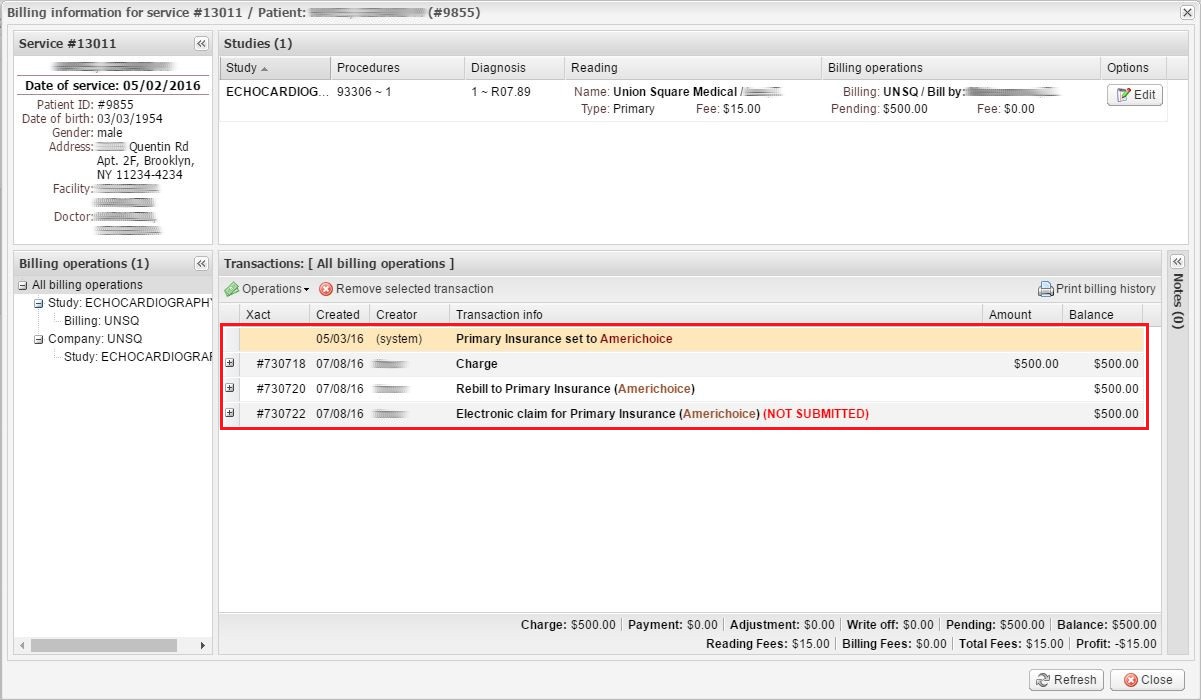
In the Transactions section you can add transactions by clicking the Operations button and selecting the required operation in the drop-down menu. The available operations are: to charge an amount, rebill (to a patient/insurance), add a superbill (for a billing company), add an electronic claim (for an insurance), add a paper statement (for a patient/insurance), post a payment (from a patient/insurance), post a denial, write off an amount, close billing, and reopen billing. After you have added the transaction, it will be displayed in the window:

To remove a transaction, use the Remove selected transaction button. The Print billing history button allows you to generate a PDF file with billing history.
In the Notes section, click the Add button to add a note. In the pop-up window you can link the note to a service or study, select the type and the subject of the note, and enter the text of the note. To edit an existing note, click the Edit button. To delete a note, click the Remove button.